Introduction
Paint.net is a free program and relatively simple in terms of interface and UI compared to it’s other ‘rivals’, like Gimp or Photoshop, while still featuring many tools and features, like layers and effects. Such effects and adjustments can still be expanded thanks to Paint.net’s community based focus and customizable nature, with the help of plugins, some of which are very useful for modding this game. So overall, thanks to it’s simplicity, it’s recommended for beginners, and thanks to it’s customizability it’s very useful to more advanced modders aswell. Download here
With that out of the way, it should be noted that these tips will be more focused for more novice users, who want to improve their work’s quality and/or create mods in similiar quality to the vanilla assets (or even better).
Layer types
These can be chosen by clicking Wrench icon (a.k.a. Properties) on the Layers window, while having your desired layer selected. They are best explained on their official page here, and it’s probably best to look at it in Paint.net yourself for experimenting, but there’s one mode that’s universally used for almost all vanilla game liverys:
Multiply
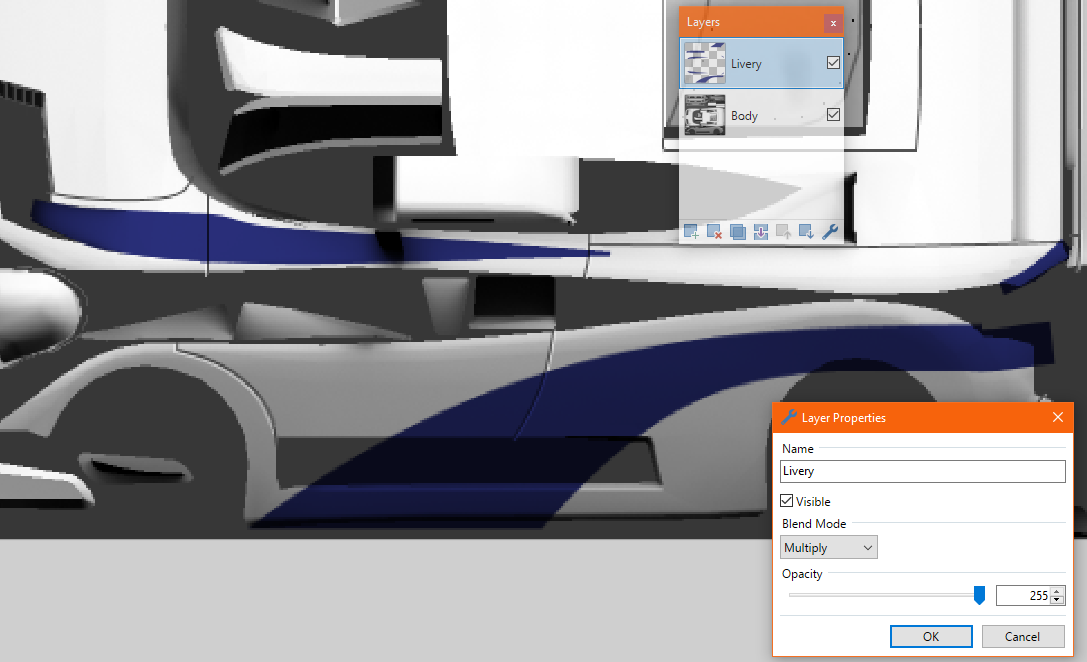
This, when added to an above layer, takes the colors of the layer below it, and multiplies/mixes them together, making the above layer a sort of mask.
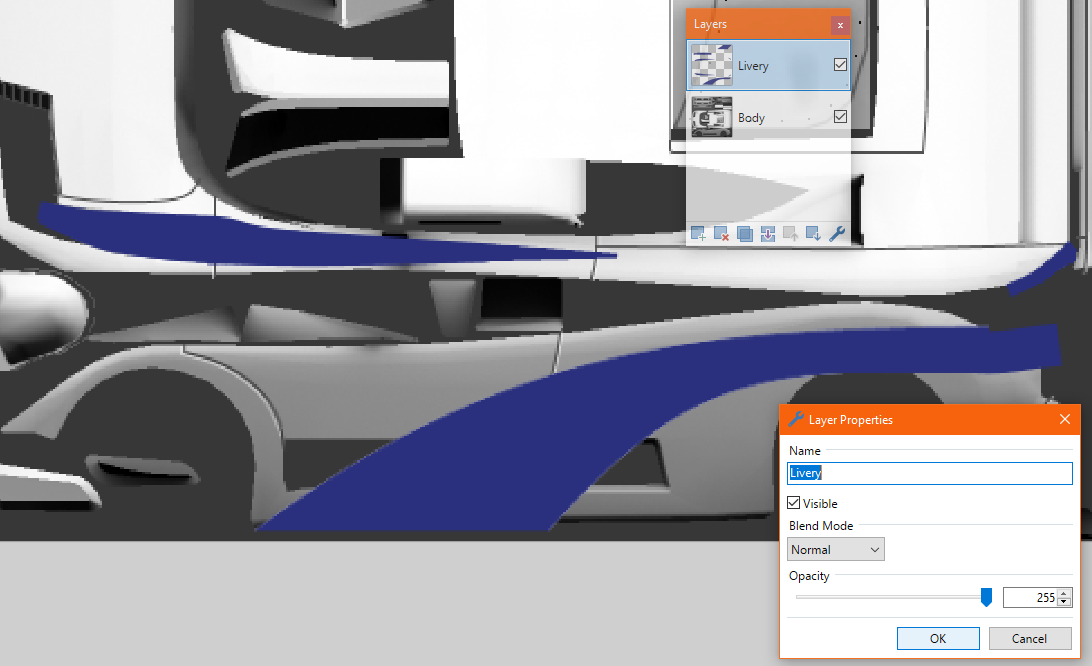
With Normal Blend Mode
With Multiply Blend Mode
This is very useful sort of ‘baking’ liverys onto an Ambient Occlusion baked body texture and if you want to replicate how vanilla game liverys look like, as they were probably made this exact way.
Except one!
Color Burn
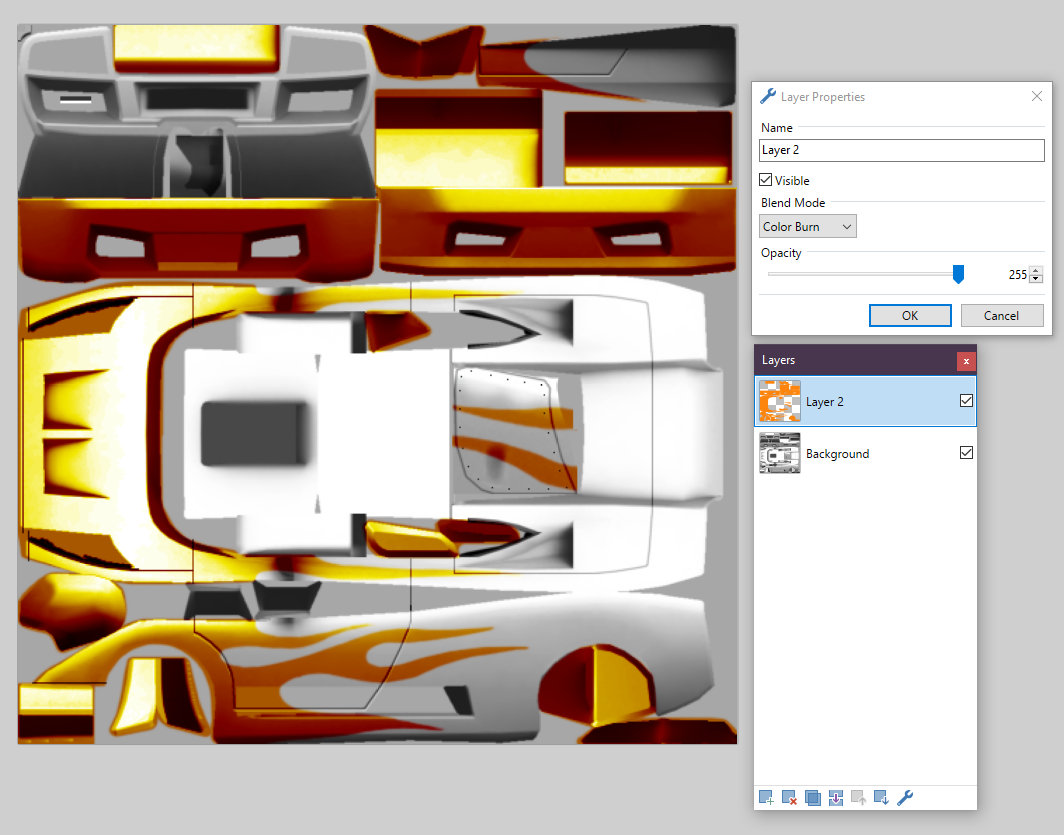
Works similiarly to Multiply, except in a way it takes the brightness values of the below layer, being body texture, and somehow applies it to the livery layer’s hue in an amplified way. This is the way the Apachee’s “Wildfire” livery was made.
For the demonstrations below, I took the Wildfire livery, made it fully white with Hue/Saturation, and gave it an orange color with the Color Filter plugin I later tweaked.
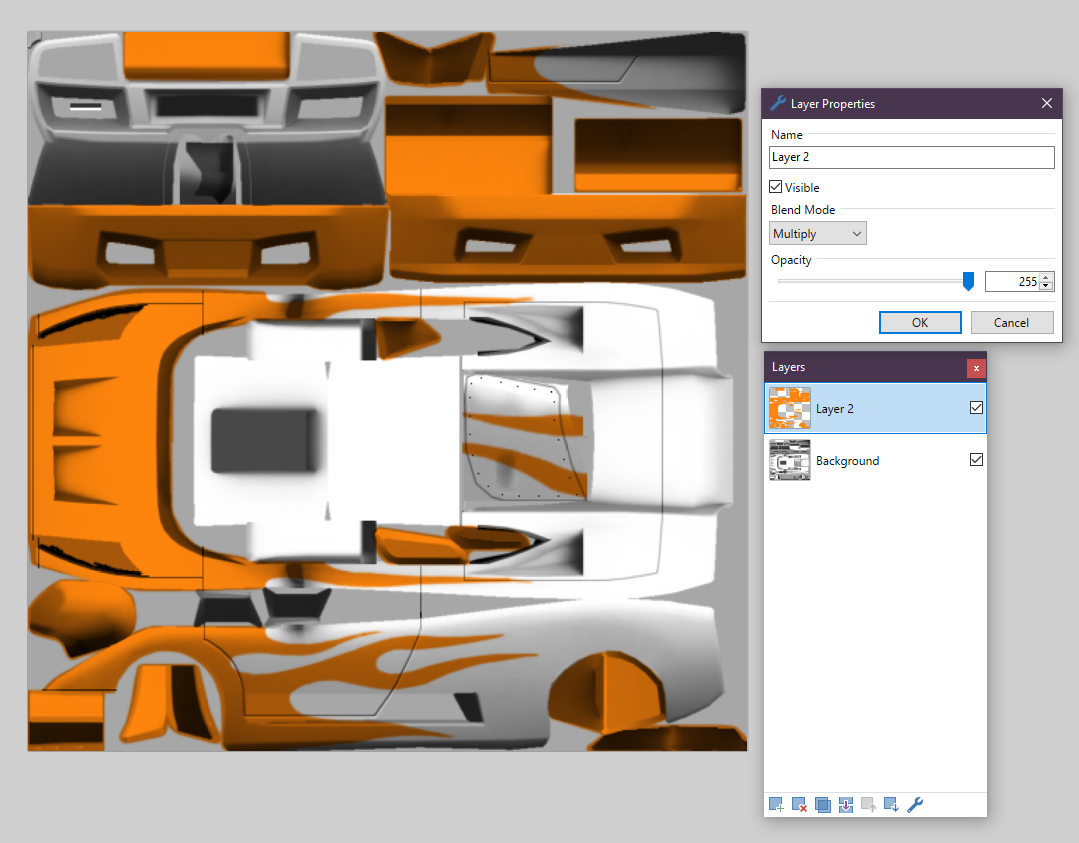
With some tweaking to Hue/Saturation I could find very close values the “Wildfire” livery used (RGB 254,133,13).
But be aware this method only works with certain colors, like blue or lime-ish colors, but usually tweaking the Lightness and Saturation after changing the Hue with Hue/Saturation, every color can work well.
The Alpha Channel and Masks
To make use of this section, you’ll need the Alpha Mask plugin, if you’ll work in paint.net.
To make most use of the method above and have parts of the car body paintable ingame, you will have to utilize Alpha Masks, but first, a little introduction to the Alpha Layer or Channel itself.
The Alpha Channel is present in any image supporting transparency, and it basically defines how transparent parts of the image should be using the RGB values in the channel. While it can use any type of image, even colored ones as an alpha layer, the channel will always be greyscale when it’s used as an Alpha Layer, so it’s more practical to create the Alpha Masks in black and white, so you even see the exact opacity values easier thanks to the RGB values being the same.
The above mentioned Alpha Mask is the actual image that gets used as an alpha layer for your texture, and when it’s applied, part of the image will turn transparent or half-transparent according to the black and white parts in the Alpha Mask.
Let’s look at a simple example to visualize it:
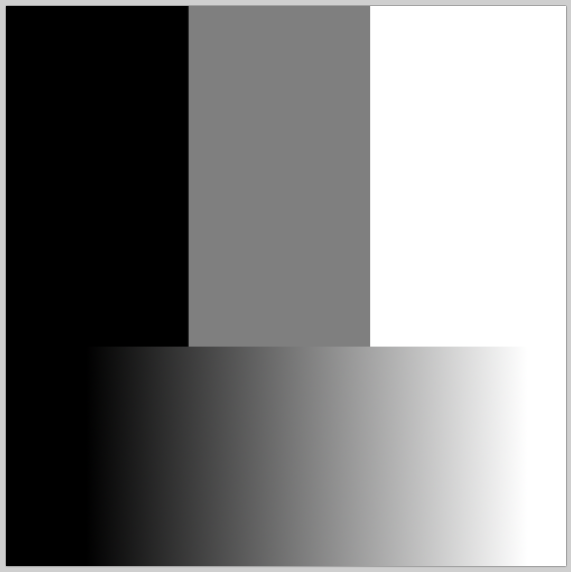
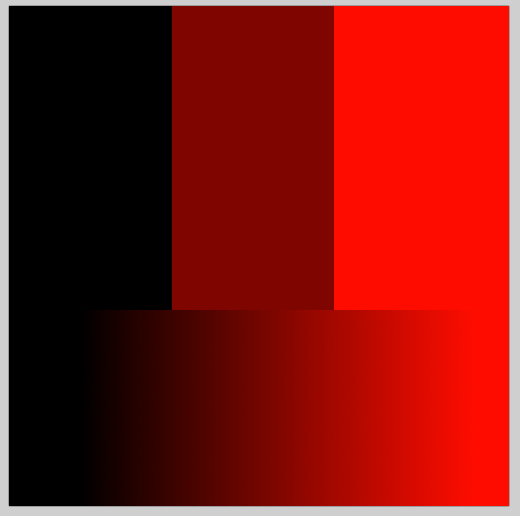
We have this image I made as an alpha map.
The top part has a 0,0,0, fully Black,
a 50 Lightness, so 127,127,127 Grey,
and a 255,255,255 White.
These will correspond to the Opacity values in an image it gets applied to, so the Black will be 0 Opacity a.k.a. fully transparent, Grey 127 Opacity, so half transparent, and White part 255 Opacity, so not transparent at all. The gradient part will just demonstrate it smoothly.
It will get applied to:
This, which is the same image I copied to a Paint.net New Image. I added a Multiply layer above it, colored it red, to better see the results.
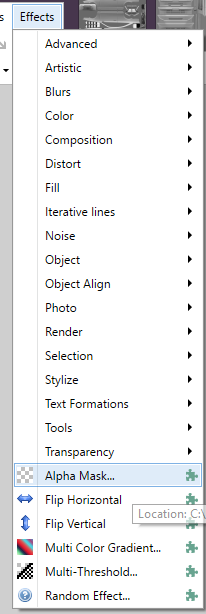
This is where you’ll locate the plugin after installation. You may not have all the tabs above it, but it will always be on the bottom.
You can either put the alpha mask image to clipboard, or save it as .bmp, then you use the plugin on the texture.
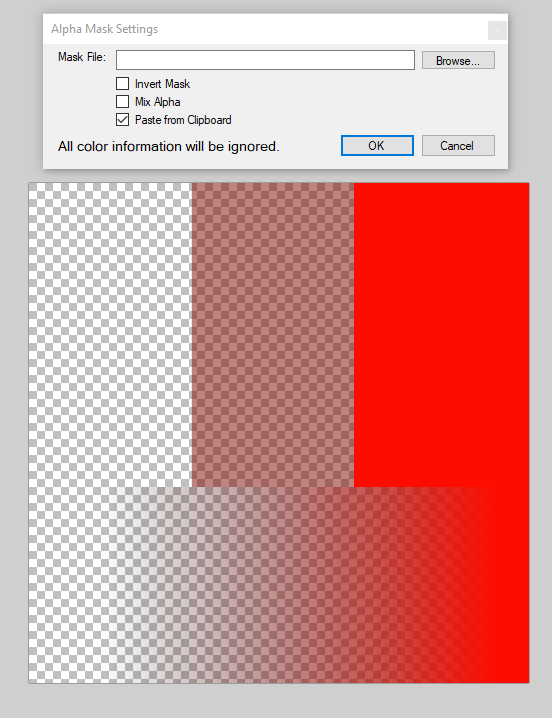
If you have it on clipboard, you’ll see it instantly, if not, you just need to open the Mask File in the Effect’s settings like displayed below.
You can see it exactly working like expected, the opacity gets changed according to the uniform RGB values in the black and white alpha mask image.
Note that you can use even colored images as the alpha maps, but the plugin will always see it black and white, since the alpha layer can only work with greyscale colors. For this reason, if you are using a colored image as alpha mask for whatever reason, apply a Black and White from the Adjustments menu so you can see what you are using better.
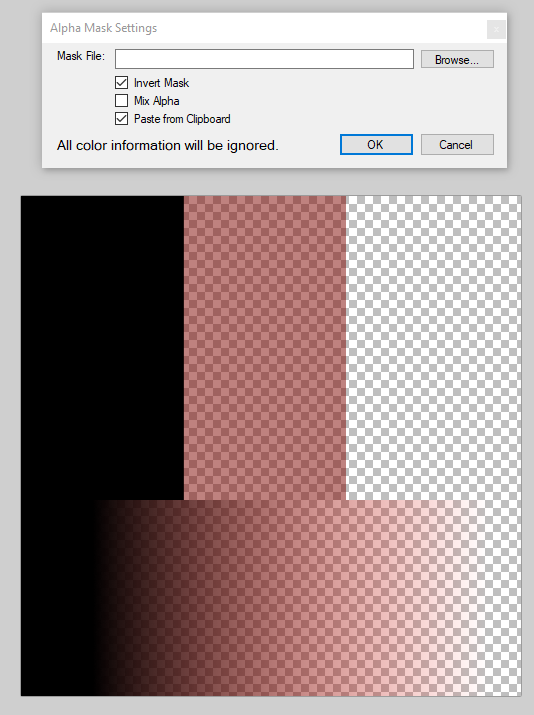
As for Settings go, you’ll be using the Invert Mask option sometimes aswell, since you could occasionally mix up what black and white stands for, and this is an easy way to fix it without needing to go back to the original image.
Applying Alpha Mask to liveries
So how do you use this for liveries? Well, you can only get the body texture onto the livery by using the technique above, which includes flattening the layers, getting rid of the livery’s transparency in the process, which means no paintable parts ingame.
So to get around it, we are gonna use the Alpha Mask plugin, exactly like it’s demonstrated above.
First, before you Flatten the layers, copy the livery to your clipboard, and paste it to a new paint.net window, which canvas’s size is the same as the livery’s.
Then, create a new layer, put it below the livery’s layer, and color it fully, 000 Black. For the livery layer, open Hue/Saturation in the Adjustments panel, and put the Lightness slider all the way to the right, this will make it a 255, fully white color. After you Flatten (Shift+Ctrl+F) these layers, it will be the image that you’ll use as an Alpha Mask, by either saving this image as a bitmap/.bmp, or copying it to your clipboard.
To make use of it, proceed back to the livery’s window, and provided you set the Layer Type to Multiply, you can Flatten it. Navigate to Effects, then down to Alpha Mask. If you saved the image, open the .bmp with Browse..., if you have it on your clipboard then just have Paste From Clipboard checked. You don’t need to check any of the other options, unless you mixed up the colors in your alpha mask, in which case Invert Mask.
And that’s it. It’s best used for final livery compiles, as it’s a longer process then just simply previewing the livery in a non-paintable, but quick flattened way.
Specular Maps
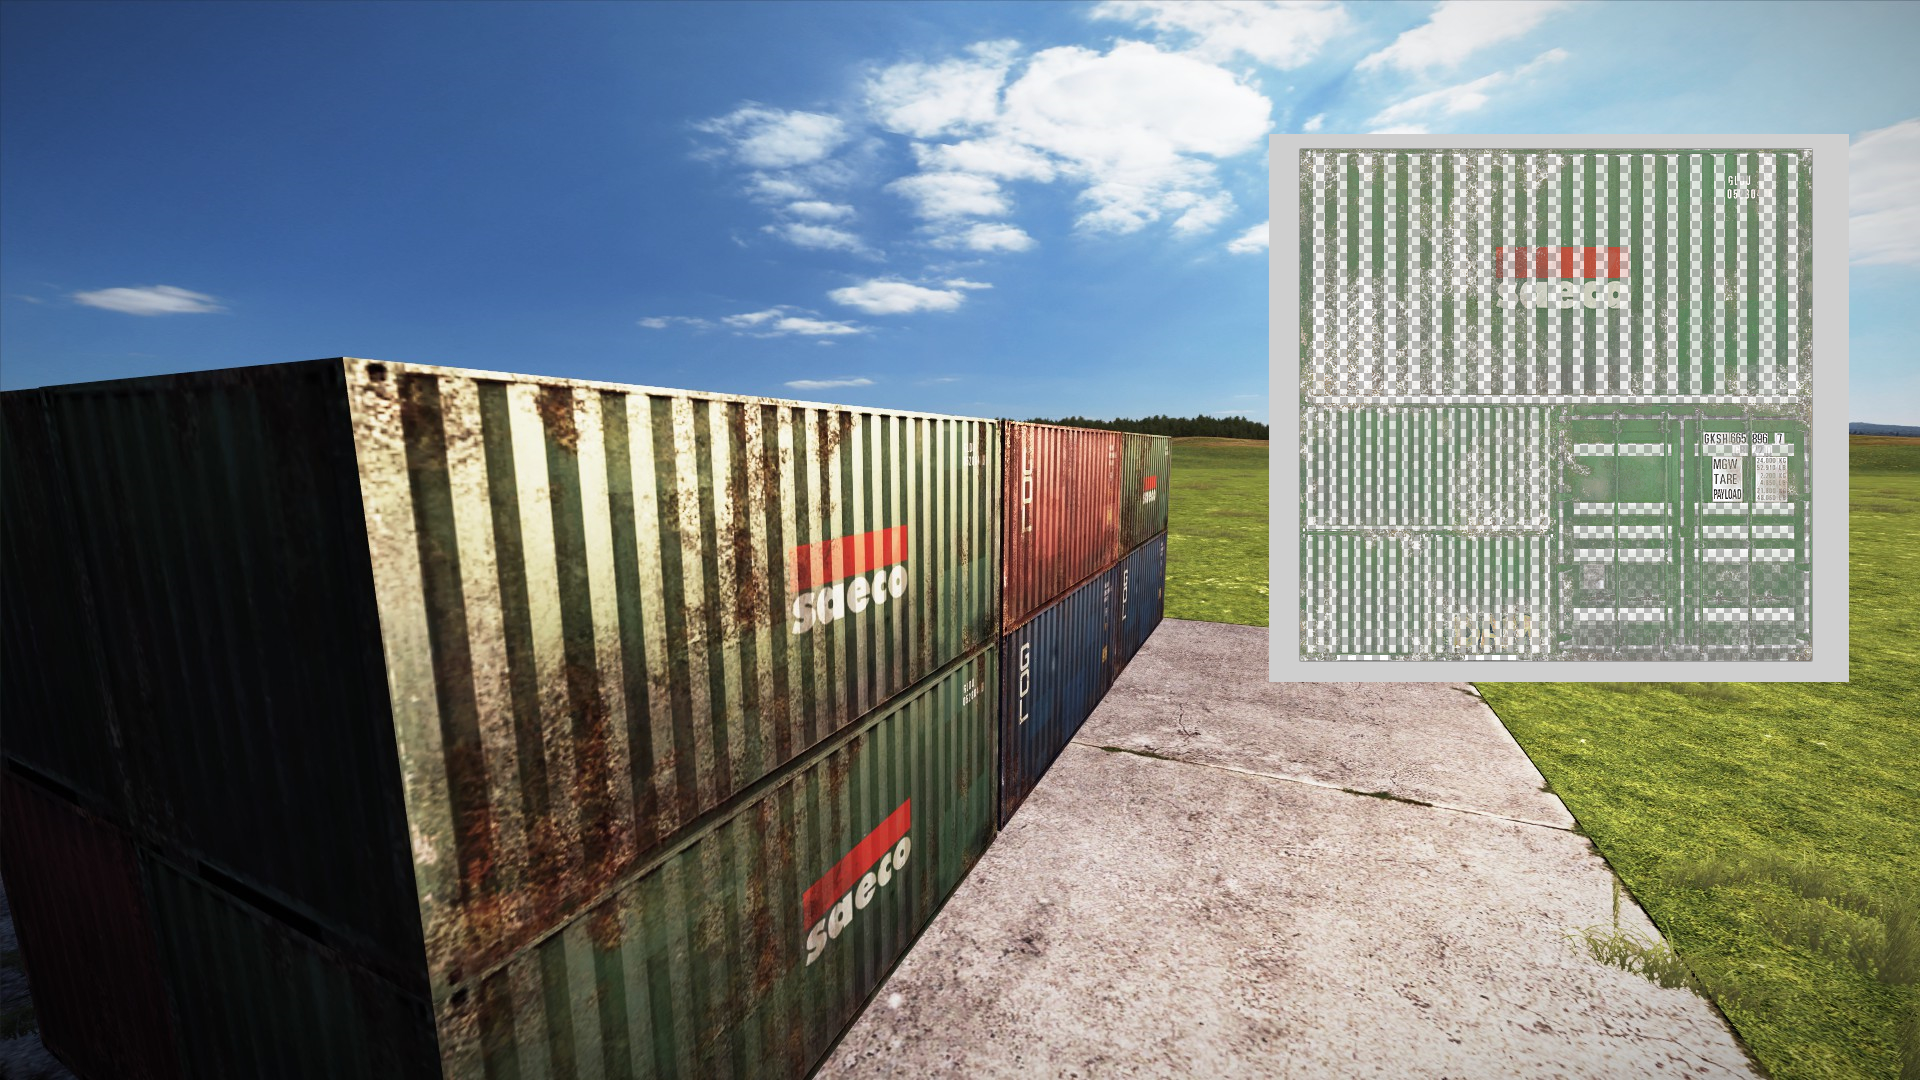
Almost all track piece textures use the alpha channel for a different purpose, being a sun specularity effect.
This image is the best demonstration of it’s capabilities. It’s the closest effect to a normal map you’ll ever get in Crashday.
The more transparent parts of the texture are, the less specular reflection it gets from the sun’s direction. The color and direction are defined in the ambiences’ files seperately.
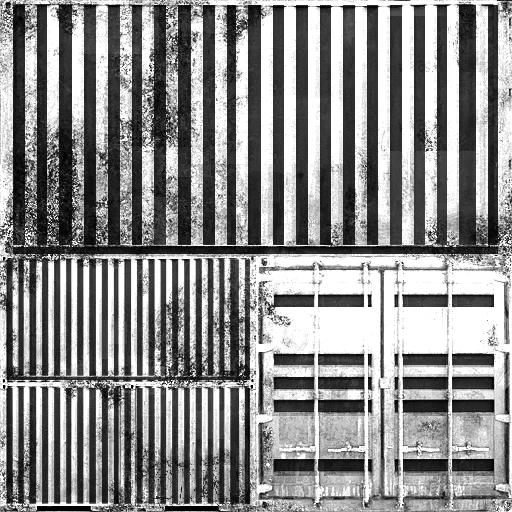
If you were to extract the Alpha Layer with a plugin effect like Extract Channel, you can see that the darker a part, the less specularity it receives.
Usually, for concrete and other simple materials, using a low contrast, much darkened version of the texture can easily suffice as a convincing specular map, but don’t hesitate to take examples of vanilla textures’ alpha layers.
