Firstly, what are overlay meshes and light flares?
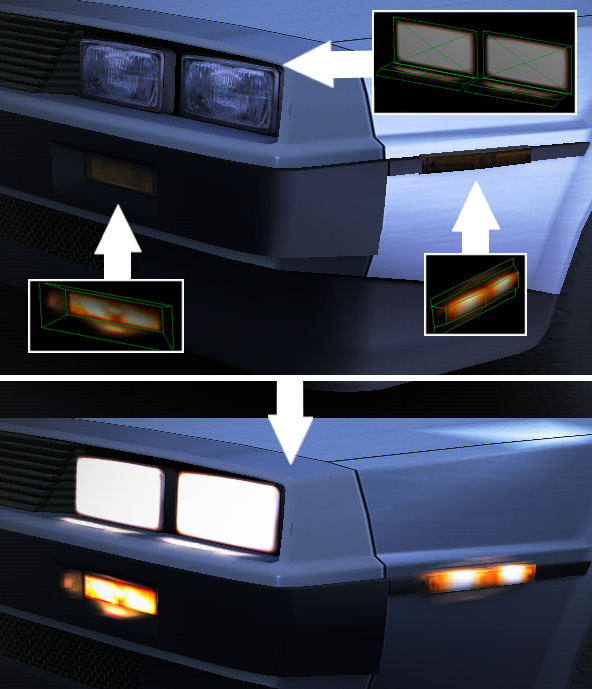
Light overlay meshes are meshes that are hidden by default, and only appear when needed. There are 2 kinds of overlay meshes: Headlights and Brakelights.
Headlight meshes serve as the front and rear lights of the car, and will only appear in dark ambiences. These have to be named headl_*something* in your model to work.
Brakelight meshes act as the rear brakelights for your car, and appear in all ambiences, when you apply the brake on your car. These have to be names brakel_*something* in your model
The easiest way of making these is to simply make a copy of the front and rear lights of your car, but can be expanded further, shown by this example here:

Now light flares (or omni lights) are not meshes, but rather light object that you add to the model, these add a special lens flare glow effect to the headlights and brakelights.
To add them:
- In Blender, they are the standard point lamps,
- in Zmodeler or 3ds max, they are the omni lights.
Side notes:
- Put them slightly in front of the overlay meshes to work properly.
- In Blender, if using the Blender .p3d exporter, changing the Color and Energy affects the light in-game.
- You can assign a maximum of 4 flares to an overlay mesh.
- Not assigning a flare to an overlay mesh by name will add a permanent, always visible flair.
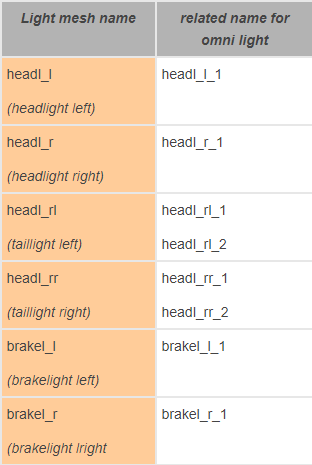
The naming goes as follows:

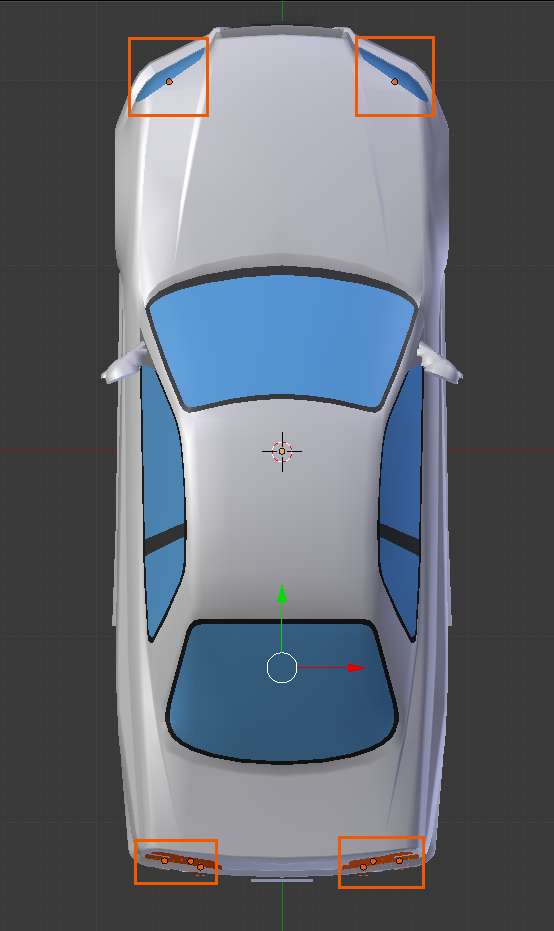
The Incubator flares’ positions (Highlighted in orange)

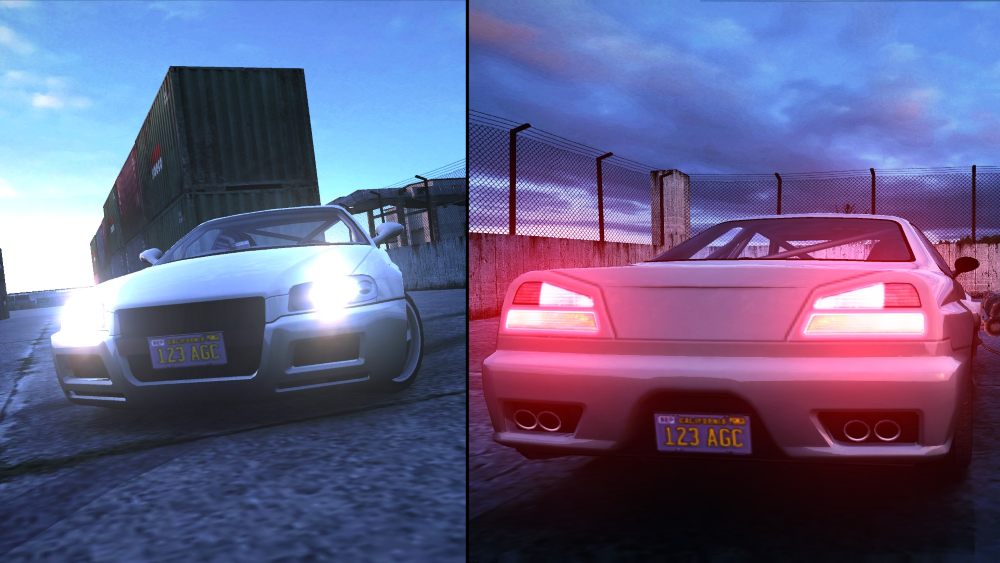
And ingame
