Introduction
This page will cover the creation of a livery, both in creating a texture, and placing said livery ingame.
This guide will assume that you already have a basic knowledge of your choosen image edtior, and can follow the more technical terms used.
Files and Textures in general
This part will be compatible with any image or text editing tool you use, as it’ll refer to standard features that can be found in most of these programs.
Files
Liveries, just like all tuning parts, need a .tun and a .lst shop file to function, in addition to the livery texture(s) in content/textures/`carname`/`filename`.tga
Refer to the File Types Documentation section and game files for setting up a new tuning part.\
The prefered format for livery textures is .tga\
Unlike other textures, it’s not needed to create or copy a .tex file for the livery file(s).
There’s a so-so bug in RE where if the .tex file of the livery doesn’t match the body texture’s, it’ll make the game error with a Width == Width message. It’s better to not add a
.texfile at all, as it’ll use the texture it’s assigned to’s.texanyway.
Textures
The method vanilla liveries use for preserving the Ambient Occlusion (shading) on the car texture, is applying the livery on a layer with a Multiply type, which will apply the the colors of the livery to the layer below, in this case, the car body texture.
The side effect of this, is that you’ll need to remove the body texture from the parts you want paintable ingame.
This is where you’ll manipulate the Alpha Channel of the texture once you are done with it. For a more throught explanation of them, visit the Paint.net tips and tricks page (not necessarily made for Paint.net users).
Advanced and specific texture guides
Avoiding anti-aliasing artifacts
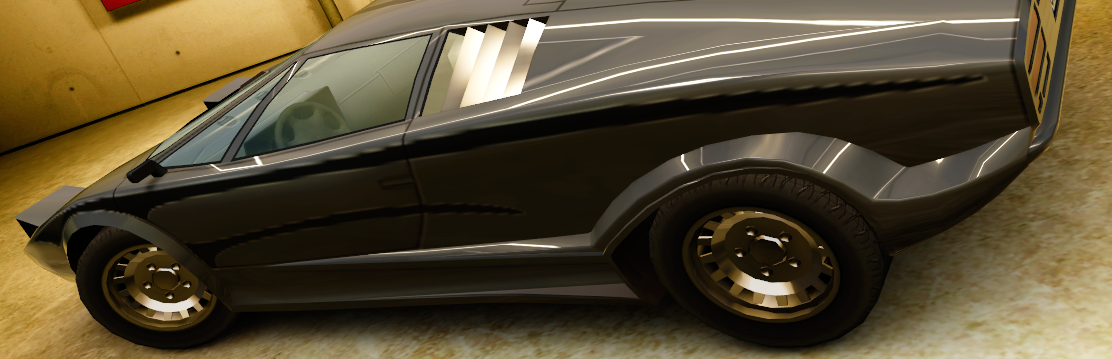
You may notice that your textures have white jagged outlines on an otherwise dark colored livery (Judge 4000VT mod for demonstration).
This is because the Anti-Aliasing on the livery isn’t the same color as the livery itself, as it’s applied on top of the light colored body texture.
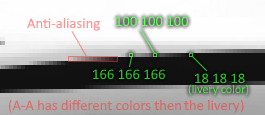
Technically, only the image you’ll apply as the alpha will need the anti-aliasing, as that one acts as the cut-out for the livery, and defines what part of it appears ingame.
Method 1, Revealing Alpha:
This is the more universal solution for liveries, as it’ll work with most of them, but it will mainly be demonstrated in, and will use Paint.net features, with help of the Alpha Mask plugin.
- First, the livery needs to be finalized, with a project file saved with the layers still not merged, in case further livery modification is needed for the future.
- Then, if there are multiple layers for the livery itself, all of them need to be merged into one layer, but without merging them with the body texture itself.
- Then, an alpha mask needs to be created like normal for the livery, which simplified, is copying the livery layer, creating a new image window, making two layers, coloring the bottom one black, and pasting the livery on the top one, applying a Hue/Saturation (or HSV in some programs) adjustment on the livery layer, with Lightness set to 100 (making the livery layer fully white), then Flattening/Merging the layers.
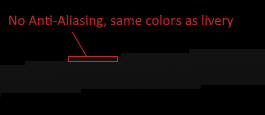
Proceed back to the main image window with the livery and body texture, and use the Alpha Mask plugin Effect on the livery’s layer, with none of the boxes checked. This will make the Anti-Aliasing fully opaque, and getting rid of it in the process. This can make the body texture disappear where the livery isn’t present, but due to the way livery applying is made ingame, it won’t matter (explained later).
If you happen to have dpy’s plugin pack for Paint.net, you can use
Alpha_to_255inEffects -> Colorson the livery layer, and it’ll have the same effect as Alpha Mask with no box checked.
Demontration:
- Then, you need to flatten/merge the image, go to the other image window, copy the image to clipboard we made as an Alpha mask in the, go back to the main image window again and use
Effects -> Alpha Mask, this time with Paste to Clipboard checked.
The result:

Method 2, Fully Colored Body: W.I.P.